Wood shutters are simple and inexpensive to make, and they make a huge impact on a home’s exterior.
They add warmth and dimension, instantly brightening a home’s overall appearance. You can DIY shutters in a day and add so much charm to your home with this easy to follow tutorial.
DIY Wood Shutters
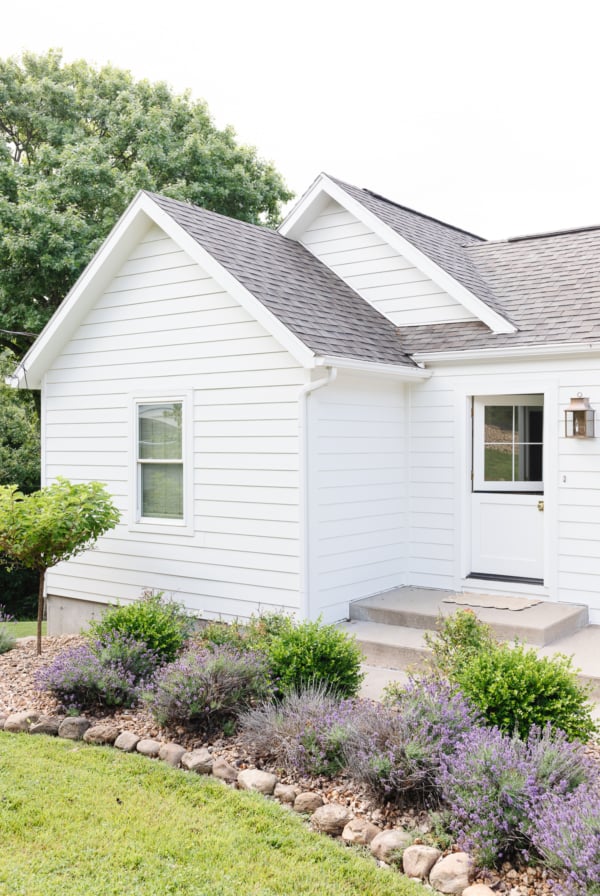
DIY wood shutters are an easy way to add curb appeal to your home along with outdoor lighting or a dutch door and a little landscaping.
It’s an inexpensive project that will give your home an instant charm. Painted or stained, they’re sure to add an abundance of timeless character.
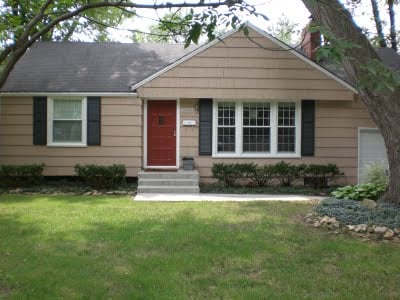
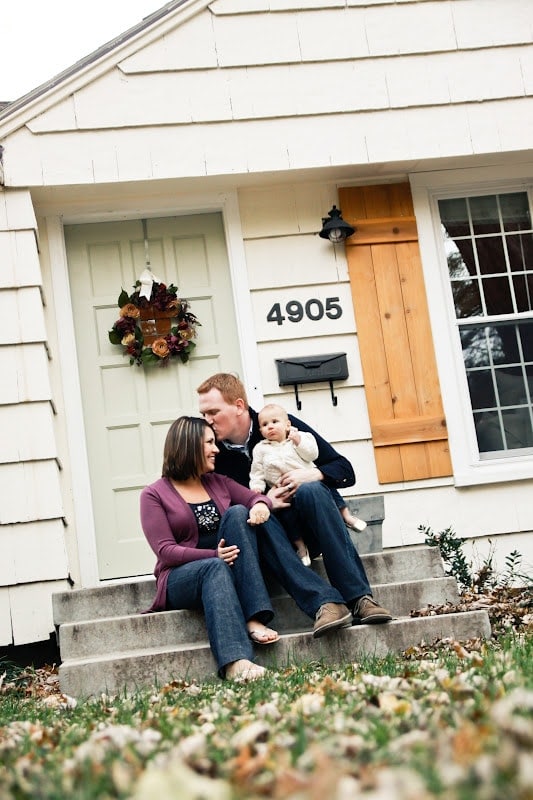
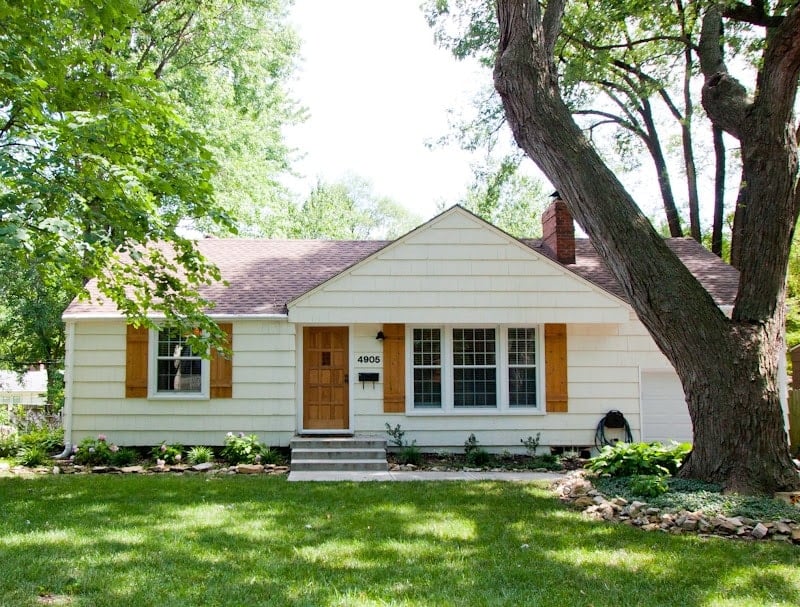
With a few small changes, you can personalize your home. With a little elbow grease, some cream color paint, a wood door and DIY shutters, we updated our home on a budget.
Purpose of Wood Shutters
Wood shutters have been a staple in American architecture from the beginning. They were used to keep pesky animals and insects from getting inside, plus to block out unwanted light, noise, wind, and weather.
They were also useful for privacy. Later on when glass became common in windows, shutters helped protect the panes from breakage.
Shutters took a backseat to heavy drapery during the Victorian Era and aren’t necessary now that we have modern conveniences such as storm windows, screens, and central heat and air conditioning. They are, however, starting to make a comeback with the current growing interest in green living and sustainable energy.
Whether they’re authentic or not, the look of shutters is charming. Many homeowners replicate it with stationary shutters that are purely for decorative purposes. Shutters just add so much dimension and warmth to a home!
Styles of Wood Shutters
There is a style of shutter for every style of home, and most of them are easy DIYs. Which style best suits your home?
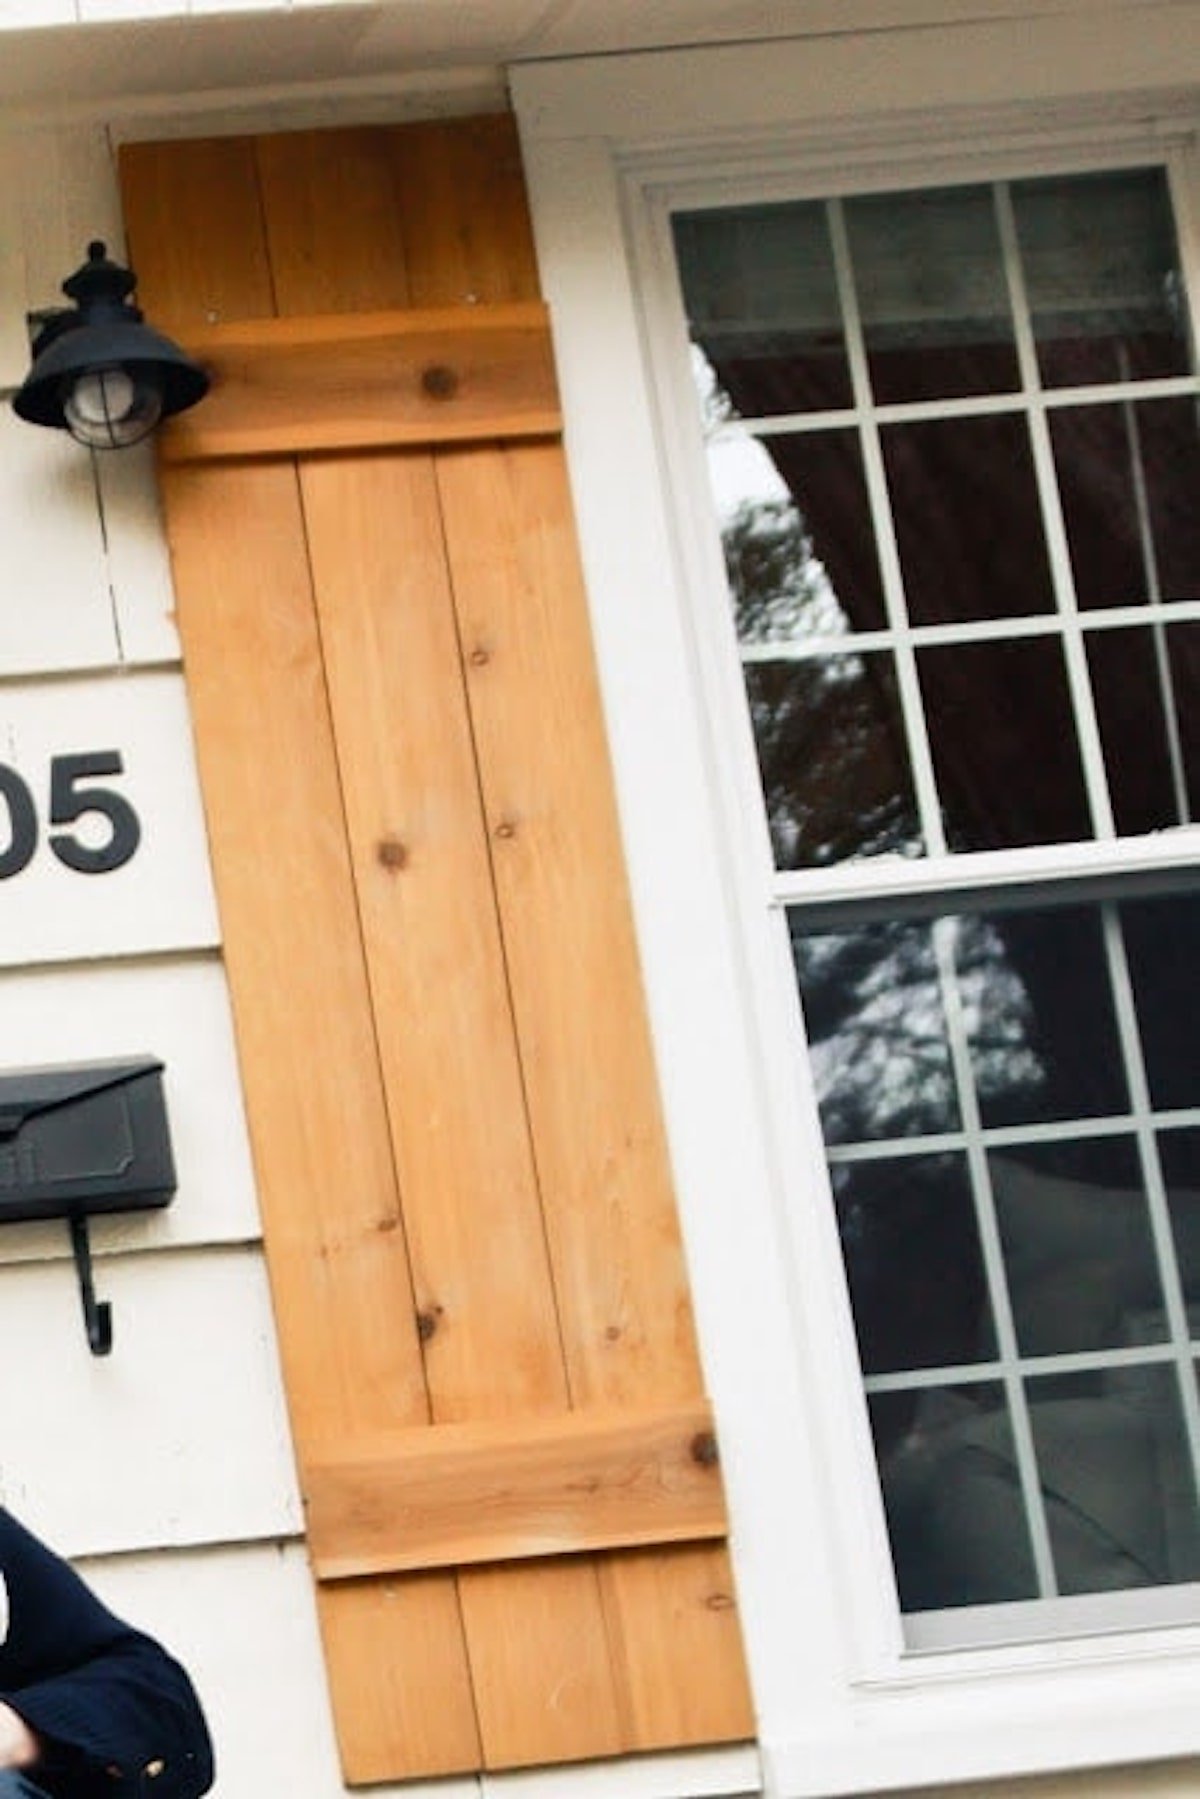
- Board and Batten – Consists of vertical planks (boards) supported by two horizontal cross pieces (battens). Sometimes there is a third diagonal piece between the two cross pieces, like the style found on barn doors. We made the simple 2-batten design for our home. It is simple and classic.
- Panel – A solid panel of wood framed by a board on each side – top, bottom, and both sides. There is often a board across the center as well. The panel can be flat, inset, or raised to suit a variety of home designs.
- Louvered – A basic frame with slanted slats instead of a panel. The slats can be fixed in place or moveable to control the amount of air and light that passes through.
- Bermuda – A single shutter hinged at the top of the window casing, somewhat like an awning. This style has slats like the louvered style to allow air, light, and sound through. There is typically a rod in the center that can be pushed up or down to open and close the slats.
What Wood Is Best for Shutters?
We used cedar for our shutters, and it turned out to be the most beautiful color. It added just the perfect touch of warmth to our home.
Whatever wood you choose, make sure it is weather resistant to withstand the elements. It should resist warping, shrinking, and swelling, even when wet. Cedar is an excellent option and is the most common choice for shutters. Redwood and cypress are great alternatives.
Building DIY shutters is easy! You can do it yourself with some basic tools. Here are the tools you will need to make your own DIY wood shutters:
Tools
- Miter saw – For cutting wood to length
- Drill/Power Driver – For predrilling holes and assembling shutters
- Tape Measure
- Hammer
- Clamps (optional)
Supplies
- Cedar Planks (or wood of choice)
- Wood shims – For spacing shutters from siding
- 1 1/4″ Exterior Screws
- Finishing Nails
- Wood Glue (optional)
How to Measure Windows for Shutters
When shutters are the appropriate size, they are visually appealing. If the scale is off and they are too small or too large, they will look out of place or awkward, so it’s important to measure properly.
First, determine if you want stationary shutters or shutters that open and close. These shutters are stationary, meaning that they don’t function.
Measure the height of your window. To make them look the most realistic, measure only the window opening and not the trim around the window. This measurement will be the height of your shutters.
Do you see how our shutters don’t go all the way to the top and bottom of the trim? This makes them look more authentic, since real shutters would close inside the trim, not over it.
For the width, if possible choose a measurement that is about half of your window’s overall width. This makes it look like your shutters could cover your window if they could really close.
For very large windows, it would look odd to make shutters half of the window’s width. In these cases, aim for about 25% of the window’s overall width, since this will create the appearance of a bi-fold shutter.
Since these DIY wood shutters are solely for decorative purposes, use your best judgment. For our shutters we wanted to use complete boards. Two would have looked too narrow for our windows. Four would have been too wide. Three boards was just right. It’s up to you!

How to Make Wood Shutters
Follow these easy steps to make your own DIY shutters. These are the perfect afternoon project!
- Measure – Using a tape measure, determine the height and width of your windows. Decide how many boards wide you want to make your shutters.
- Cut Lengths – Cut your boards to the appropriate length. We chose to use 3 boards per shutter. Since we were making enough shutters for 4 windows, we cut 24 lengths of board (3 per shutter x 8 shutters).
- Choose Spacing – Decide on your spacing between boards. We decided we did not want any space between the boards, so we clamped them all together lengthwise. If you want to leave some space, use evenly sized spacers such as coins in between, then clamp together. *Without clamps – have one person hold the boards tightly together while the other assembles.
- Cut Supports – Measure the total width of the shutter. We measured the width of all 3 boards clamped together. You may be measuring 2 boards, or boards with some spacing in between. Whatever you decide, measure the width of your shutter and cut 2 support pieces to that exact length.
- Attach Supports – Attach support pieces about 6″ from the top and bottom of the shutters. Attach with wood glue, and nail with finishing nails from the front. Carefully turn the shutter over and screw into the support pieces from behind. For best results, predrill holes first to avoid splitting wood.
- Stain or Seal – If desired, stain or seal your shutters according to instructions. Let them dry completely before handling.
- Attach to House – Place shims behind shutter in the corners to leave 1/4″ – 1/2″-inch space between the shutter and siding. Attach shutter to siding using screws (preferable) or nails, one in each corner (going through the shutter and shims).
Total Investment
$150 for 4 sets (we did the side as well!)
Added charm – Priceless!
Why Leave Space Behind Shutters?
It’s important to NOT install the shutters directly against your house siding. Moisture, leaves, dirt, and other debris can become trapped behind shutters with no way to clean them out. This can cause both your wood shutters and siding to deteriorate and rot. We definitely want to avoid this!
There’s a simple solution, and that is to leave a little space behind your shutters. This will allow air to circulate, allowing your shutters and siding to dry out after becoming wet. You’ll also be able to clean out behind your shutters using a leaf blower or long dowel.
It’s easy to leave a space using shims or a small board secured to the back of your shutters. This will hold the shutters away from the house. When you screw or nail your shutters into place, do so through these spacers to ensure they remain in place. Problem solved!
Variations of DIY Shutters
I chose to keep our shutters simple to create a classic, cottage feel. But since this is a DIY, your imagination is the limit to what you can do with your own wood shutters! Here are a few ideas:
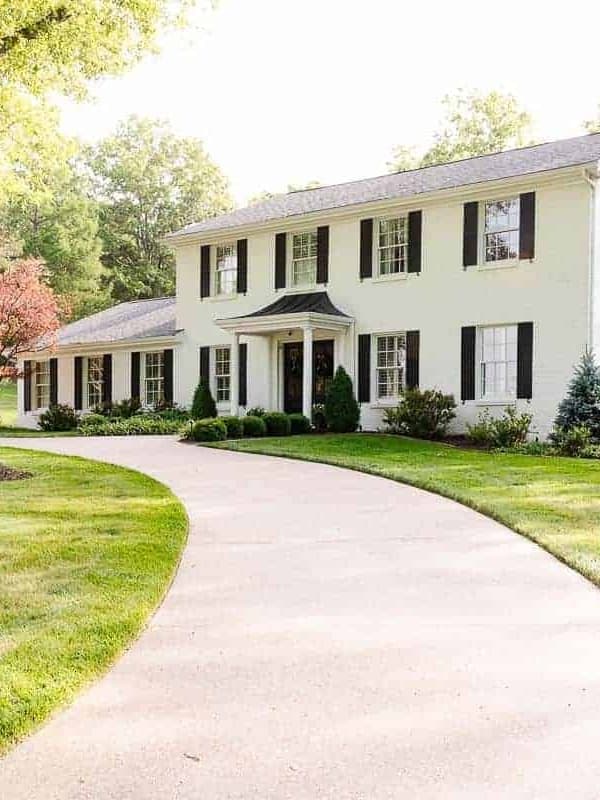
- Paint – Of course, paint is an easy, inexpensive way to personalize your home. White shutters would look lovely against a dark exterior. Or paint them your favorite color for a fun touch.
- Style – Change the style of your shutters by changing the way you put them together. Modern – Try horizontal boards held together by vertical supports from behind (not visible). Traditional – Put your vertical boards together like we did, but then add a frame around the top, bottom, and sides (attached in the same manner as step #5 above). Trendy – Break out your miter saw and make some angled cuts. Herringbone shutters, anyone?
- Hardware – Add some decorative hardware, such as carriage house pulls, hinges, or nailhead trim.
Choose a wood that is weather resistant and won’t warp, shrink, or swell. Cedar is the most common choice for shutters. Redwood and cypress are also good options.
Yes! DIY wood shutters are quick, simple, and inexpensive to make. Follow my tutorial for the how to.


Thanks Maggie! I miss that house for the shutters alone! Glad you enjoy the blog!
Hey your wood shutter looks great! It was done like a pro, good job! I am a frequent lurker of your blog Julie, and I love your every post! I learned something every time.
I’ve been meaning to make my own wooden shutter for our basement remodeling. Thanks a lot for this very helpful tip!
I think they look beautiful! They give it a charm that is quite welcoming. Well done!
I came across this on dwellinggawker… love the wood shutters!
Thanks Julia! I hope you enjoy my other home posts as well!